
First Flight Modeling
Original concept sketch by the director for a needed trash can in the short film
"First Flight":
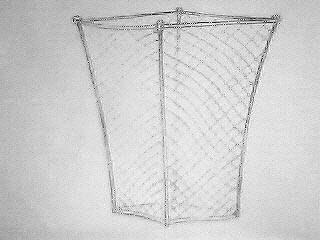
As part of the production crew, I was asked to model the above trash can.
I knew this could get ugly if I trapped myself to manual modeling - I could see the art directors reasonably wanting "small changes" of the thickness of the posts and mesh wires, as well as the shape of the trash can. So I wrote a Mel script which took in 2 values for radius of both the mesh and post sizes, as well as an input profile curve for the arching shape of the can. This way I could easily build multiple combination of this prop with thinner or thicker mesh relationships, as well variations based on shape from the input profile curve. Of course, because I did this, they ended up being happy with the first version.
In essence, the script does the following:
-
Build the Wire Frame of one side
-
Build the Mesh Weave of one side
-
Duplicate the side
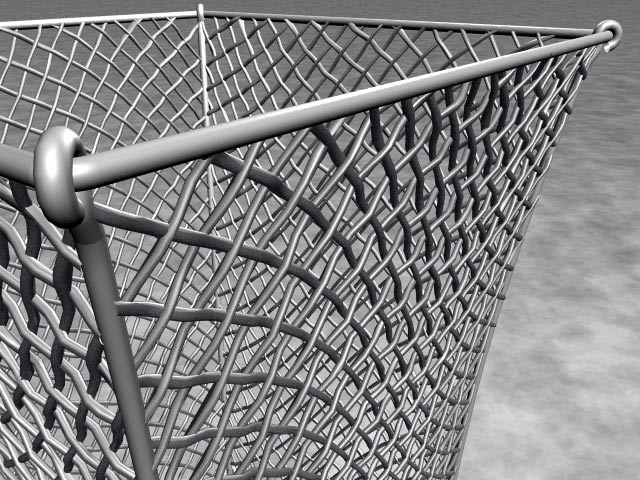
For the frame, a seamless quarter side is built with an extrusion side post based on the input profile curve, with an added top loop. A similar extrusion is built for the bottom rail as well. Both the loop and bottom rail wrap around appropriately based on the thickness of the wireframe dialed in.
For the mesh, it's a bit more complicated.
-
Diagonal curves are generated from opposite corners of each face along the X plane, forming an "X" in the target side as viewed from Z.
-
Small straight extrusions (the wires of the mesh) are evenly placed at 90 angle to each of the above curves. There are two sets, one for each set of angled wires.
-
Both mesh sets are "weaved" with non-linear deformers (sine wave) in opposite phases of each other.
-
The weaved mesh then has an additional sine deformer added to it for the "French curve" present in the sketch.
-
Trim surfaces are generated which follow the sides of the input profile curve within the X plane.
-
The mesh wires are then intersected with and then trimmed by the above made trim surfaces.
-
So far, all of the above steps for the mesh have occurred in a flat plane. Now the mesh has to be bent to match the shape of the profile curve to match up against the wireframe posts. I used a brute force method of offsetting each cv in all mesh wires by the same offset of the input profile curve along the X direction. Basically, iterate a point curve on the input profile curve, and get an offset x value for any given height along the profile curve. Not fast, but only has to be done once, and it's very precise.
Though this model is "heavy" in geometry, but pretty much has to be to hold
the definition of the weaves. It is not heavy at all to
render - Maya's render took about 15 seconds (on 2005 hardware)
to crunch out the renders below. It also tumbles in Maya
interactively at a decent clip, especially in Nurbs. This prop
is not for games, but fine for film needs.
Basic Maya Renderings:
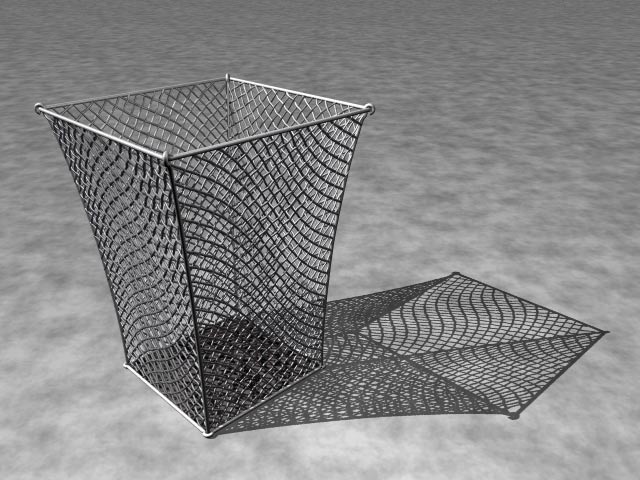
In a rather stereotypical Hollywood storyline, the production chose to drastically reduce the detail originally requested for this model in the final renderings of the film. I had fun making it regardless. 😀
Maya Polygonal Base File - 12.5 Megs compressed:
Maya Nurbs Base File - 3.4 Megs compressed: